January 27, 2008

lemon cloud cupcakes

Yes! it's raining again - I know I shouldn't complain, after all it does seem to happen rather a lot! You would think I'd be used to it by now, but really I'm a Summer girl at heart!.........still, it was the perfect excuse to bake a little sunshine into my life. Lemon Cupcakes to banish away those grumpy grey clouds, inspired by the bright yellow and white primulas bravely standing sentinel against the assault of the rain in the barren Winter garden. Not that I ever need an excuse to bake cupcakes anyway, since I love them in all their enticing incarnations...
These ones, I decided, would be lovely and lemony and dense, with a swirl of fluffy pink & white icing. So, off I went with flour, sugar, eggs lemon and butter all thrown into my basin, to be transformed twenty minutes later into gorgeous edible nuggets. Isn't it amazing how a bowl full of apparently unrelated looking creamy goo can manifest into something so wonderfully and completely different, all springy and golden. It's like magic!!

Unashamedly, I'll admit that my favourite part - and sometimes, the whole reason for baking! - is to eat the leftover cake mix straight from the bowl........(funny really how there always seems to be more mixture than I need). It's one of those childhood things that has stayed with me......it was always a real 'treat' to be given the bowl to clean out when mum was baking......scraping around the sides eagerly with a spoon, that velvety, vanilla flavoured confection that just melted on your tongue.

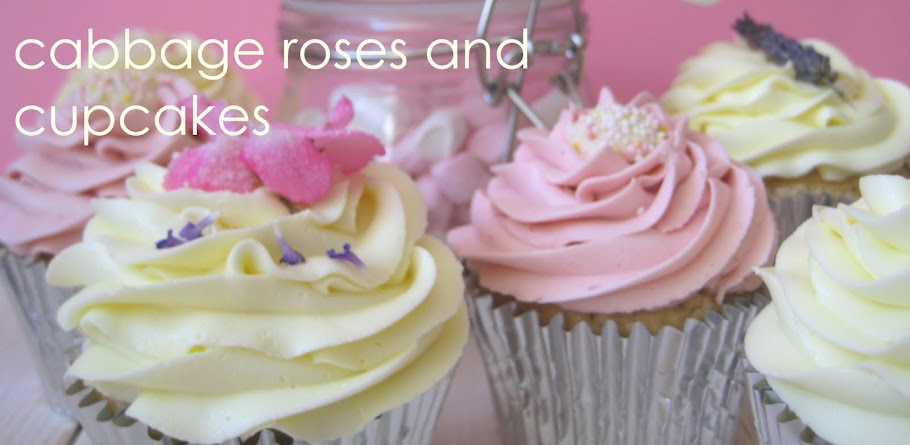
Anyway, here's my own recipe, a blend of various basic principles. The texture of the cakes is more madeira than sponge - a little more heavy which makes them more substantial. For the icing I decided to keep it plain with just a little vanilla flavouring, although you could add some more lemon juice or zest if you wanted it lemony too. The two-tone colour is really easy to achieve as well, simply by loading the icing bag with pink down one side, and white on the other!

And.... before I go, here are some links to some other gorgeous things cupcake-related.....cupcake shaped soaps and so cute knitted cupcakes from Betz White.


Lemon Cloud Cupcakes


175g self-raising flour
100g butter
100g caster sugar
2 large eggs
zest and juice of 1 lemon + a little milk

Icing:
275g Icing sugar
175g butter
4 Tablespoons milk
Pink food colouring
Vanilla essence


It couldn't be easier to make these. Just put all of the ingredients for the cakes into a mixing bowl and whizz up together until it's pale and fluffy (a couple of minutes). The consistency needs to be fairly soft, so you may need to add a little extra milk - flours vary in the amount of liquid that they take up - to make a 'soft dropping' consistency.

Spoon the mixture into cake cases (I used muffin moulds) to about two thirds full, and then bake in the oven at 190C / 375 F / Gas 5 for 20-25 minutes until they are golden and spring back when touched. Leave to cool.

For the icing, soften the butter in a bowl and then mix in the icing sugar and enough milk to make a soft fluffy icing. Divide the icing in half and colour one half with pink colouring, then pile into an icing bag with a star nozzle - pink on one side, and white on the other - and swirl it onto the cooled cakes.
Instant sunshine!

January 25, 2008

getting started!


I just wanted to post a quick hello and welcome to anyone coming across my fledgling blog......I've very recently discovered the wonderful world of food, and non- food, blogs that exists out there. I can't believe I've never stumbled across them before! I'm excited about all the fantastic recipe inspirations, and entertaining commentary I've found - aha!! ......yet another way to feed my fanaticism for all things food related! In fact, I'm loving it so much that I couldn't wait to join in and share my own gastronomic ramble through life with other food-loving souls too. What a fantastic excuse for me to indulge my love of food, cooking, photography, and writing, all at the same time!, and..... giving me the perfect alibi to 'play' on the computer!...........heaven!
So, I hope that you will bear with me while I get started and add more posts to share with you, and that you enjoy my experiences and 'ramblings' as much as I do all of yours!
Alfie

January 24, 2008

B's deli inspiration

Yesterday B was in experimental mood, and inspired by my favourite lunchtime indulgence from our local Deli Barringtons, he decided he would have a go at his first ever proper pastry flan! "I mean, how difficult can it be?" he said in true 'man' style "...it's basically just an omelette in pastry!" Well, I couldn't disagree, he did have a point............Although not strictly a 'Quiche' in the true definition of the word, which brings to mind a rich eggy custard, soft set with a million and one different delicious combinations, this concoction of meltingly sweet, vegetables, slow roasted and piled into a rich crumbly pastry case with eggs, cream and cheese, was heavenly.......I might even dare go as far as to say that it may be even better cold! I brought some to work for my lunch today, and the pungent garlicky smell (you've probably already guessed that I'm a bit of a garlic fiend!) as I opened the crinkly brown paper packet was mouth watering. Thank you B.


B's Roast Vegetable and Mozzarella Flan

Pastry:
50g Lard
50g Butter
225g Plain Flour
Pinch of salt

Roast Vegetable Filling:
1 each of
Red Pepper
Aubergine
Onion
Courgette
2 Sweet potatoes
Good quality Olive Oil

Mix together: 2 eggs, 150 mls cream, 3-4 cloves of garlic, herbs (whatever you have to hand - oregano/basil/thyme/tarragon work well)

Salt and Pepper
75g mozzarella
Cherry tomatoes

Chop the vegetables into chunky pieces, and toss in the olive oil in a roasting tin. Roast the vegetables at 200C / 400 F / Gas 6 for about 45 mins to an hour, until they are soft and starting to brown.

While the vegetables are cooking prepare the shortcrust pastry case. Rub the lard and butter into the flour until it resembles breadcrumbs, or whizz in a food processor. I prefer to rub in by hand just simply because it's more satisfying (if a little messy, but then that's what baking is about, right?, getting up close and personal with the food!) and you can control the texture better. Anyway, back to the recipe....bring the pastry together with a little cold water, just enough to bind. Be gentle!, over-handled pastry becomes hard. Cover the pastry in cling film and leave in the fridge to 'rest' for about half an hour. This will mean that the pastry won't shrink so much when it's cooked. Roll out the pastry on a floured board (B used a handy bottle of wine in the absence of a rolling pin!) and use to line a 23cm (9 inch) flan tin.

Prick the base and sides of the flan with a fork to help it to cook evenly, and then bake blind for 15 minutes in the top part of a hot oven 190C / 375F / Gas 5 - 'baking blind' just means baked without a filling. To stop the pastry rising too much, or losing it's shape, you generally line the pastry with baking paper and then tip in dried beans while it cooks, but I've also seen recipes where they suggest crumpling up foil instead. Here's how Delia does it...

When the vegetables are roasted to a melting heap, layer them into the baked pastry case interspersed with the torn up mozzarella, and egg/garlic/cream/herb mixture. Finally, dot the top with cherry tomatoes for extra colour if you like, then bake again for about 30-40 mins in the centre of the oven, 190C / 375F / Gas 5 until the flan is set and golden brown.

I like it served with a crunchy salad and tangy dressing for added bite.....

This is a great flan to add your personal touch to by experimenting with the amount and types of vegetables you choose, and you could also substitute goats cheese, or parmesan for the mozzarella for other scrumptious flavour variations!

January 19, 2008

lazy sunday afternoon


Serendipity:

A happy or lucky discovery that happens by accident

That's what I love most about life, when you stumble upon something wonderful, completely by accident, and just when you're not expecting it!


Last Sunday was grey, damp and blustery, exactly what you'd expect of a January day, no wonder so many animals hibernate........hmmm actually that doesn't sound like a bad idea!
So anyway, to escape the creeping malaise, my man B. and I ventured out to our local
Farmer's Market in Winchester in search of inspiration.

I started to get excited at the sight of the green and white striped awnings. The fruity, musty smell of mulled wine and cider drifted around the stalls, mingling with the hog roast, ripe cheeses, smoked garlic and bread. We wandered through the market.......what to choose, what to choose?!
Eventually, we decided on a some rich and buttery
Tunworth soft cheese, and some oak-smoked garlic, all warm smelling and woody in it's golden tissued sheath. Excitedly we carried home our hoard, constantly opening the bag to sniff the wonderfully pungent aroma of the mixture, already anticipating the feast ahead!

Deciding that the perfect partner for the cheese and garlic was with some other autumny/wintery tastes; walnut and pear, I baked a Walnut and Pear Tea bread to go with them. A kind of cross, really, between a scone and a soda bread with nutty nuggets and earthy dried pears. I made mine with wholemeal flour, but if you prefer the texture a little lighter you could use half white and half brown flour. It's quite a dense loaf, and really needs to be eaten on the day it's baked - not that that's any real hardship!
With the Walnut Pear loaf cooling on the rack, I baked the cheese in it's box (minus the wax paper of course!) with a few cloves of the oak-smoked garlic nestled in it, in a hot oven - 200 C / 400 F / Gas 6.

What a lovely cosy and indulgent way to end a dismal, dark Winter afternoon; sat by the crackling firelight with a glass of Port, scooping the oozing garlicky cheese straight out of the box with the bread. The nutty, pear-sweet taste being the perfect foil for the luscious creamy, tangy cheese.........mmmmmmmmm heaven!

If you fancy trying the Tea bread for yourself, here's how,...... my adaptation of a basic soda bread / scone recipe........


Walnut Pear Tea bread


175 g wholemeal self-raising flour

50g oats

50g butter

1 egg + 2Tablespoons of walnut oil - made up to 150ml with natural yoghurt

50g each of walnuts

25g-50g dried pears, depending on how sweet you want it

1 tsp salt


Measure out the flour, oats and salt into a bowl and stir to mix.

Rub the butter into the flour mixture - or, if you prefer you could bung it all in a food processor and whizz it up until it looks like the butter is well incorporated, a bit like breadcrumbs. Then stir in the nuts and pears.

Add the wet ingredients, and bring together lightly. If you overwork the mixture you'll end up with very solid, hard tea bread!

Tip out onto a floured surface and knead lightly to bring it all together. Then shape into a rough oval and put on a floured baking sheet. Score lines across the top of the loaf for decoration, and then bake at 190C / 375F / Gas 5 for about 30 minutes until the loaf is golden brown.

This is lovely eaten when slightly warm, either smothered with salty butter, or as we ate it, just dipped straight into oozy unctuous cheese.........enjoy!!